Purchaser's flexible Custom Attributes allow you to track the exact information you need. At default there are a few required attributes including name for a vendor and an email for a contact. You can enrich your vendor network by adding attributes for location, description, and any other details that matter to your business.
Add Custom Vendor & Contact Attributes to track specific details for each vendor and contact in your network. Once created, these attributes will be reflected on all your vendor profiles and contacts allowing your team to populate each record with the relevant data.
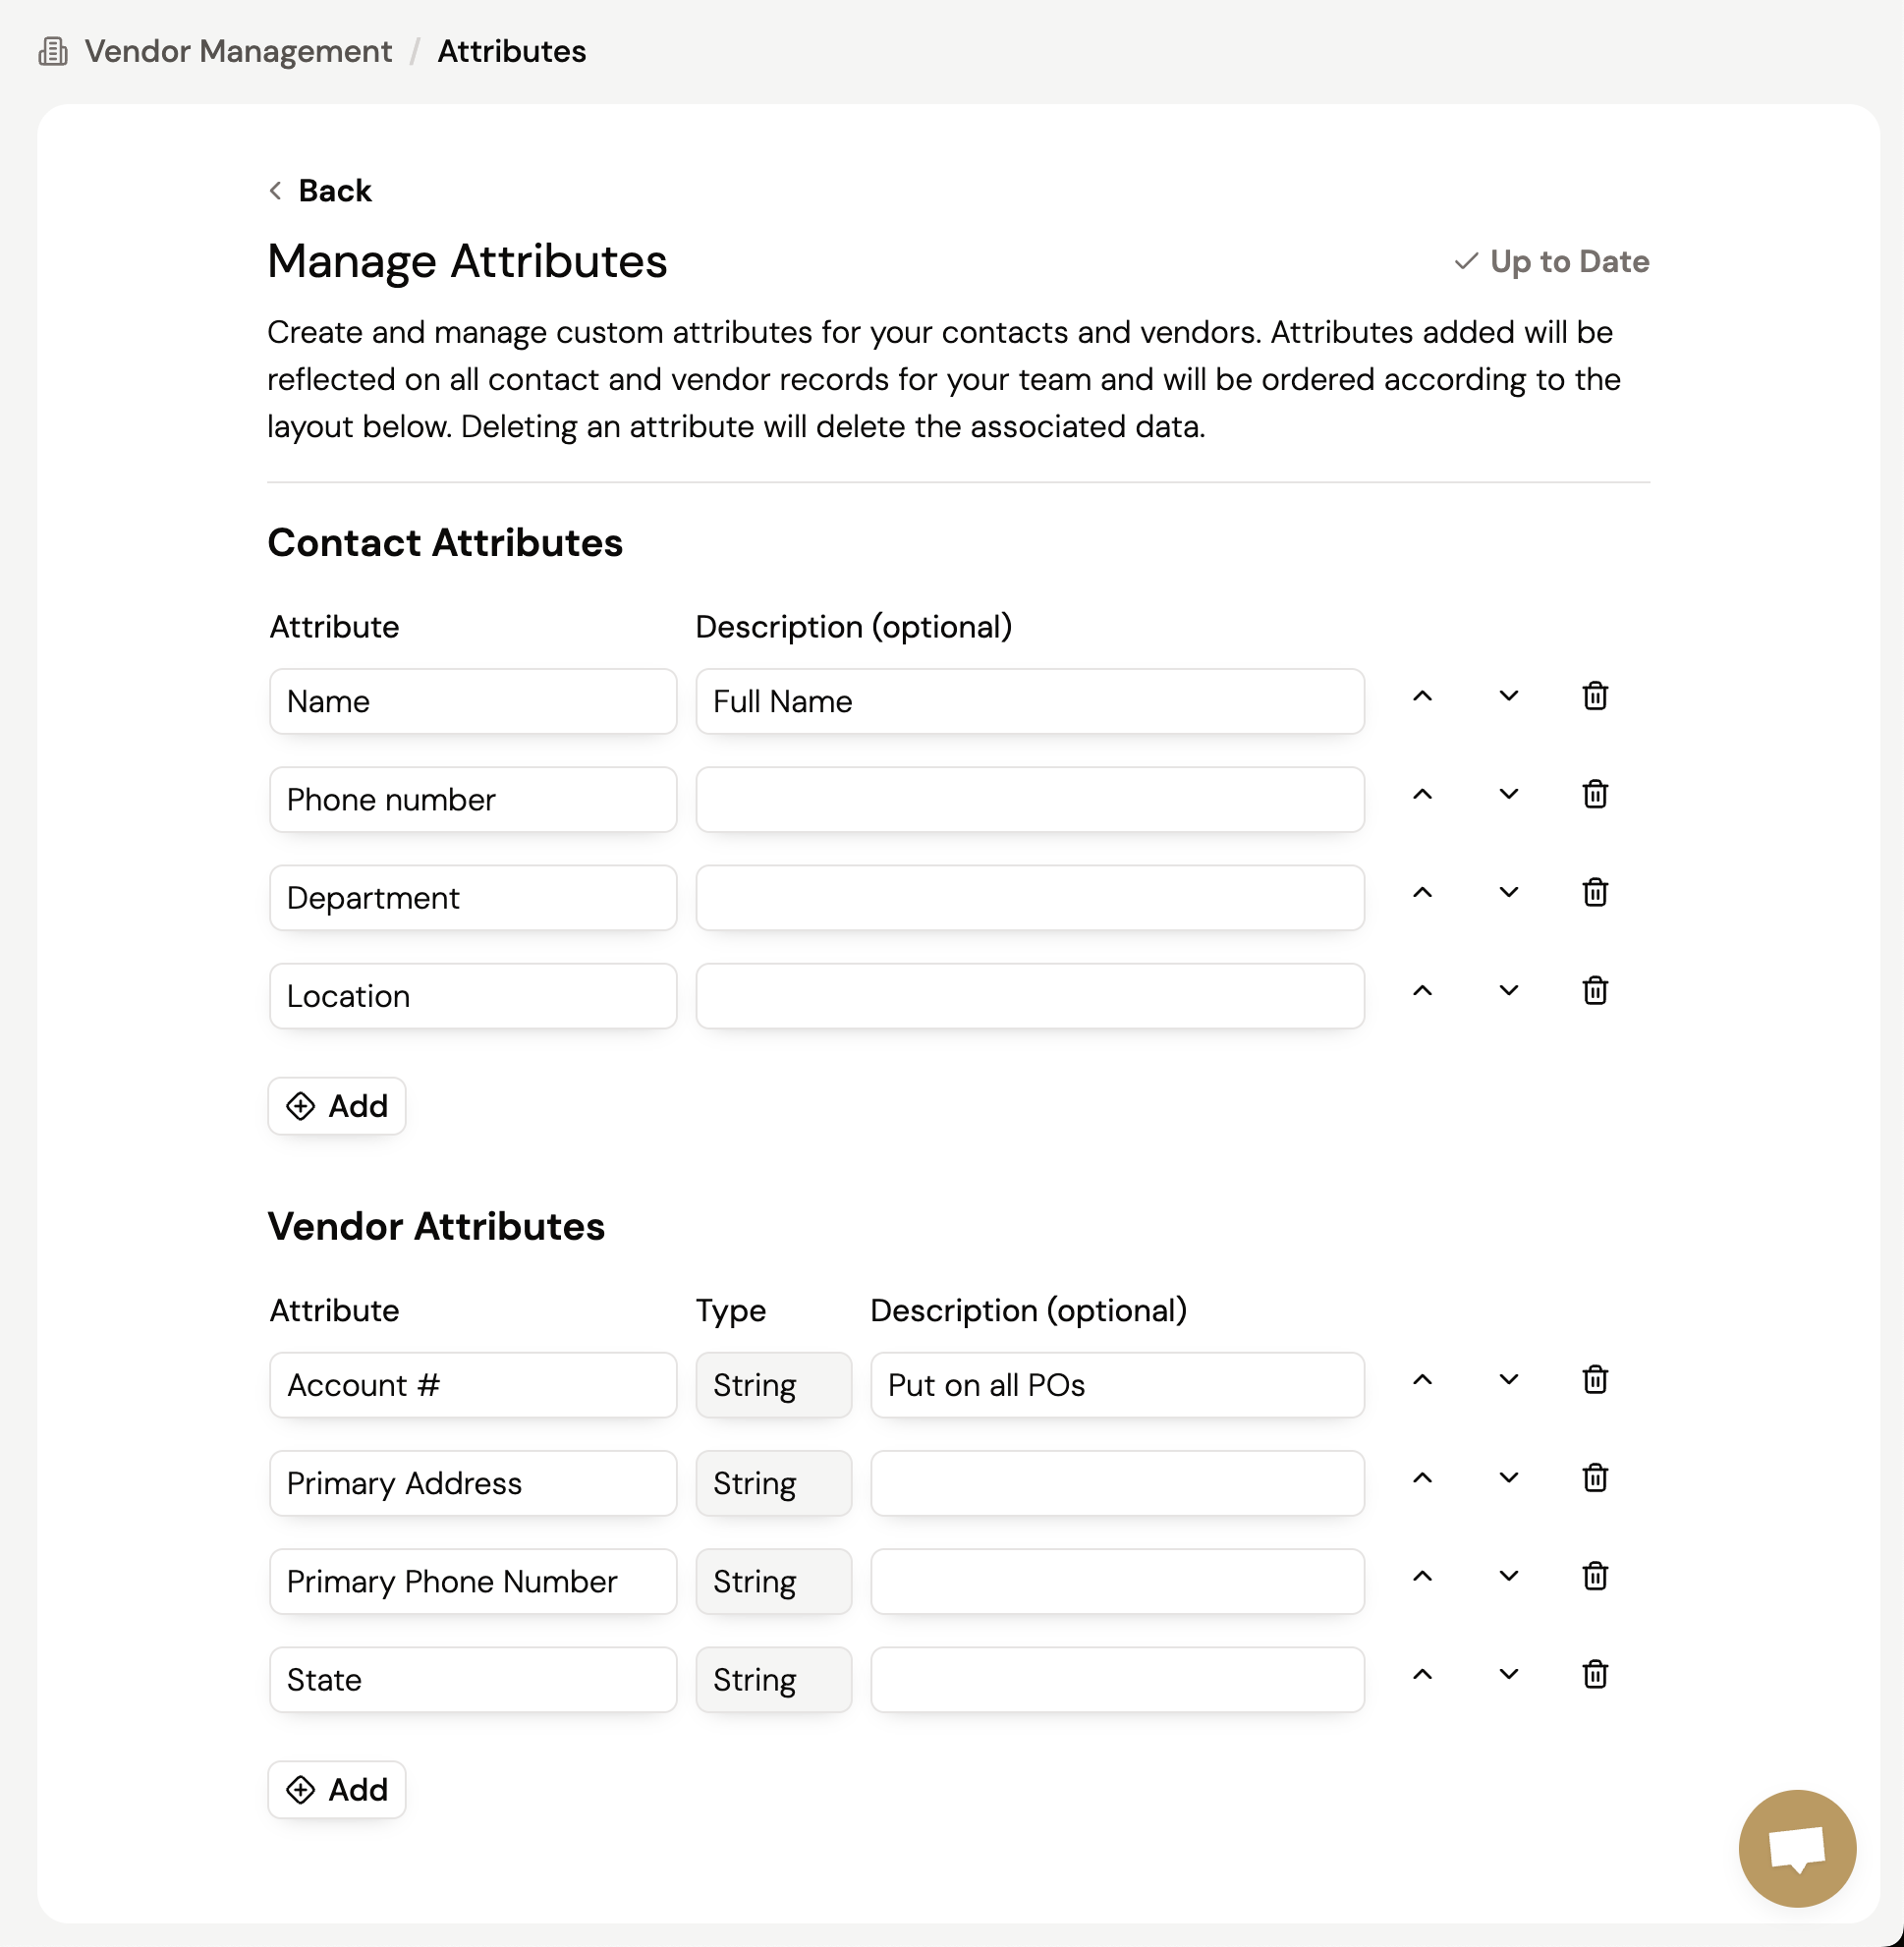
From this page, you can manage all your custom attributes. Any changes you make like reordering or deleting will be applied to every vendor or contact in your network.
Deleting a custom attribute will permanently delete the attribute and all its associated data from every vendor or contact. This action cannot be undone so double check before deletion.
To learn more about our vendor management capabilities, visit our other guides.
Still got questions? Contact Us or Book a Demo to learn more about how Purchaser can fit into your workflow.